XML Component
INTRO TO THE XML COMPONENT
The XML component is an extremely versatile component that allows you toretrieve data over the web as long as the respective data is structured as avalid XML format. What's great about this component is that you can createyour own structure which can be any XML data source and be able to bind tospecific attributes and elements to retrieve the information snippet that youneed. If you want for example to build a dynamic food menu board and retrievethe food prices and images from a local POS (Point of Sale) system; the XMLcomponent can easily be configured to do just that. The XML component canalso connect to a database engine.
The XML component uses standard E4X Tags so it's easy to get specificinformation using elements and properties / attributes. The XML component canalso bind to a series of elements thus retuning a list; so you can flipthrough several items one after the other.
CREATING A NEW XML COMPONENT
In this section will demonstrate how to configure the XML component using theXML data structure below.
|
|

The Local Point of Sale can feed the information to XML component over an HTTPlink and this information includes the burger name, the price, and also aresource description set as an image.
|
|

We can use the above data structure to dynamically feed into our food menuboard.
To demo the setup we configured a simple four screen configuration along withsome images that were added to the timeline. The images are going totransition over a background image.
|
|
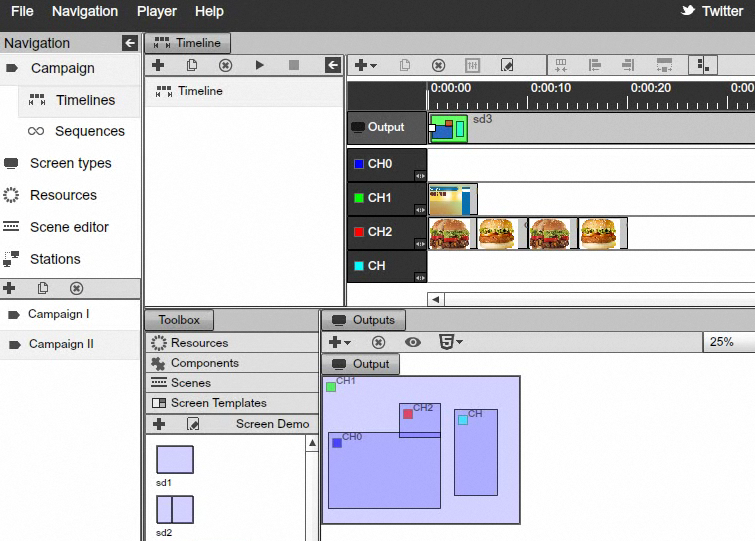
|
|
What we need to add to the presentation are the prices and the descriptions ofproducts, and so let's set it up.
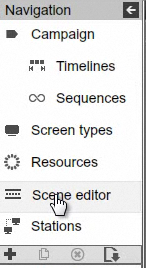
First, we will navigate to the Scenes area of the Signage Studio.
|
|
Click on the + sign to add a new Scene.
|
|

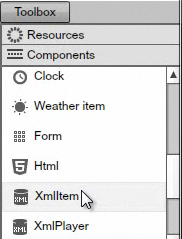
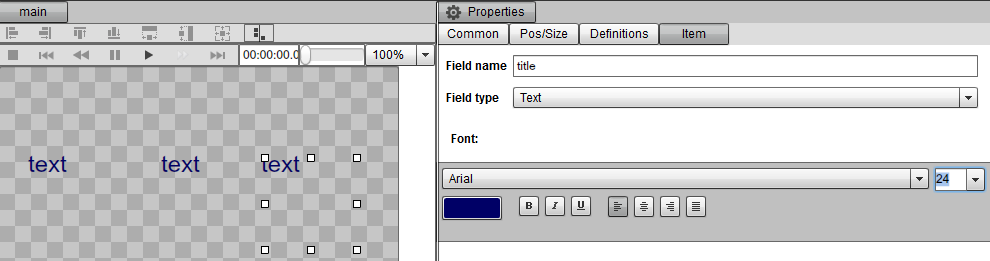
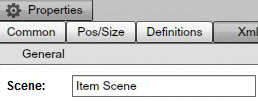
Rename the Scene, we will call it "Item scene." Drag the XML Itemcomponent from the Components library and drop it into the Scene. We will addthree XML Items, one for the name of the product, the price of the product andone for the image of the product.
|
|
|
|
The Scene we are creating will represent a single product like a hamburger orcheeseburger for the food menu. The data will be present a single record inthe food menu board.
Next we can change the color of the Items and the font. Also we can position /align the three items in Scene.
|
|
Next, we need to map each XML Item to a proper attribute. In order tounderstand what attributes are, let's take a look at our xml structure.Looking at the XML structure, we can see that we have several properties foreach product.
|
|
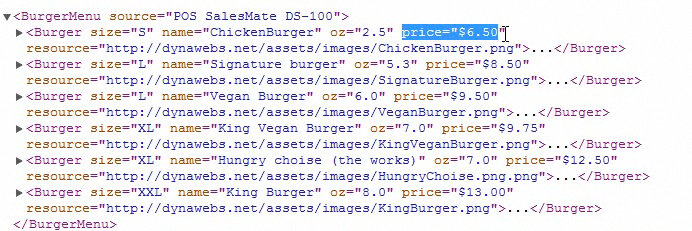
The attributes are the size, the name, the oz., the price and the resource.The way we bind to the attributes is through the @ sign. Next, let's goahead and set up the attributes for the XML Items inside the Scene thatwe've created.
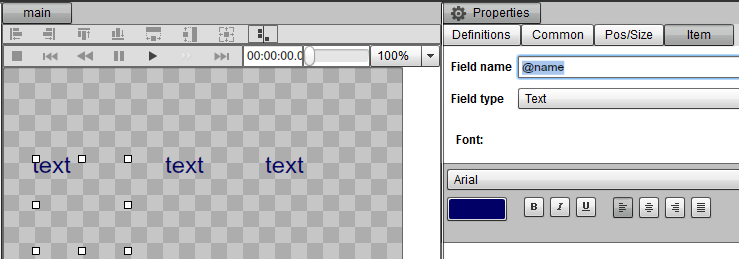
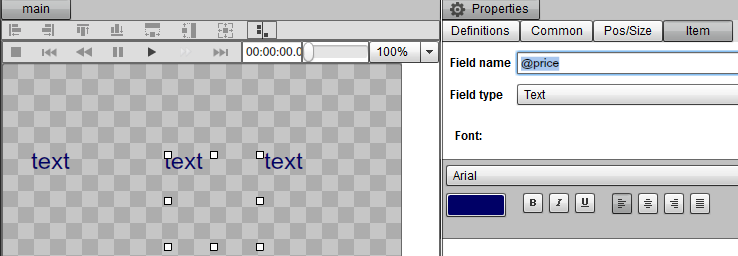
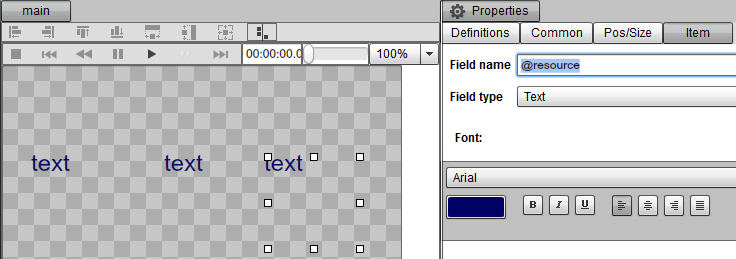
First, select one of the three XML Items and set the attribute @namefor the Field name, in the properties panel. Also select the second object andset it's attribute to @price and for the last object set theattribute to @resource
|
|
|
|
|
|
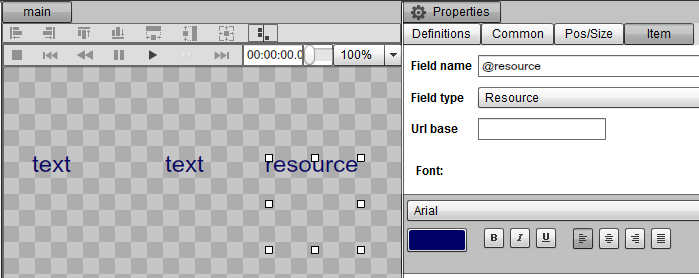
For the last item, also set the Field type to Resource so we candisplay an image.
|
|
Remember that you don't necessarily have to use the XML structure from ourexample, you can invent your own XML structure as long as it is a valid XMLdata structure.
To recap, so far we've created a scene that will hold a single Item, inother words a single product. Next, we need to create a scene that is going tohold all products; all the different items from our XML structure.
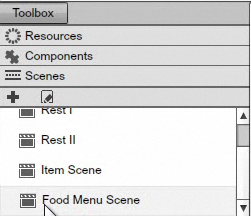
Click on the + sign and add a new Scene.
|
|
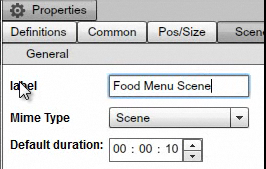
We will rename the Scene Food Menu Scene. You can also choose to modifythe size and other attributes of the Scene.
|
|
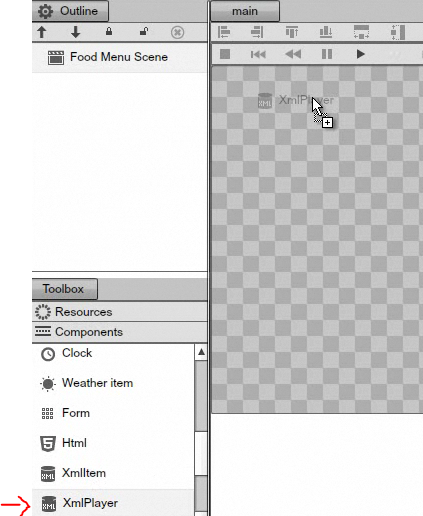
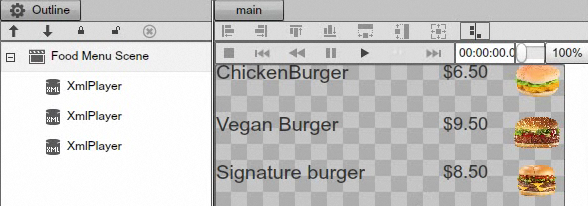
Next, we will look under Components for the XML Player Component and dragthree XML players into the Scene. Each player will be present one particularproduct, so we have a total of three products. Of course, if you want to havemore products, you can simply add additional XML Player Components.
|
|
Now that we have our three XML players that are going to display threeproducts in our wrapper Scene, (the Scene that is going to hold them), we needto associate each one of those XML players with a particular product.
We will point each XML player to the data source; the POS system that isserving the XML file.. To do this, type the URL address that contains the XMLfile into the Url field in the Properties panel of each XML player.
|
|

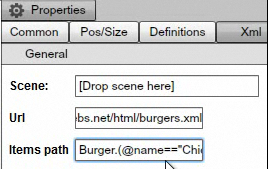
Next, we are going to set up each XML Player to show a unique product. Inorder to do this, for the first product we will build an E4X statement.
|
|

So in order to pull this information from the XML file, we need to create anE4X statement which is going to be the following:
|
|

Of course you can choose other attributes of the products.
Type the E4X statement into the Items path field of the Properties panel ofthe selected XML player.
|
|
Next, in order to display the Item we need to associate the proper Scene witheach XML Player. Drag the Item scene that we've created earlier, from theScenes, under the Toolbox (again, don't drag the original Scene but ratherDrag the one from under the Toolbox), and drop it into the Scene field of theProperties panel of the selected XML player.
|
|
Repeat this process for all three Products, so you can have all the relateddata pulled into the appropriate XML Players.
|
|
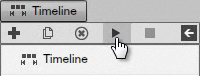
The next step is to add the Scene to the timeline. Navigate to the Timelinesarea of the SignageStudio then drag the Food Menu Scene we've createdearlier and drop it into the Timeline.
|
|
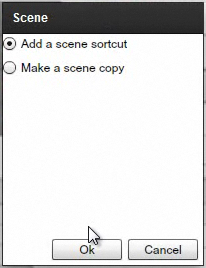
You will see a dialog box as soon as you drop the Scene into the Timeline.Choose Add a scene shortcut and click OK.
|
|
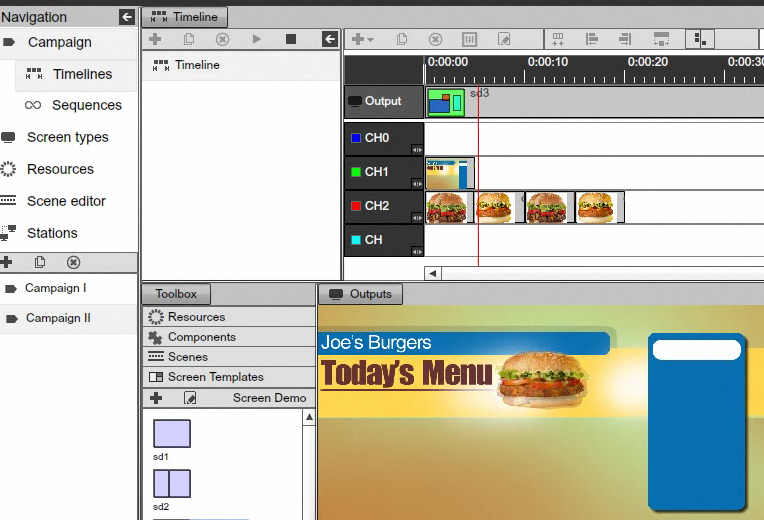
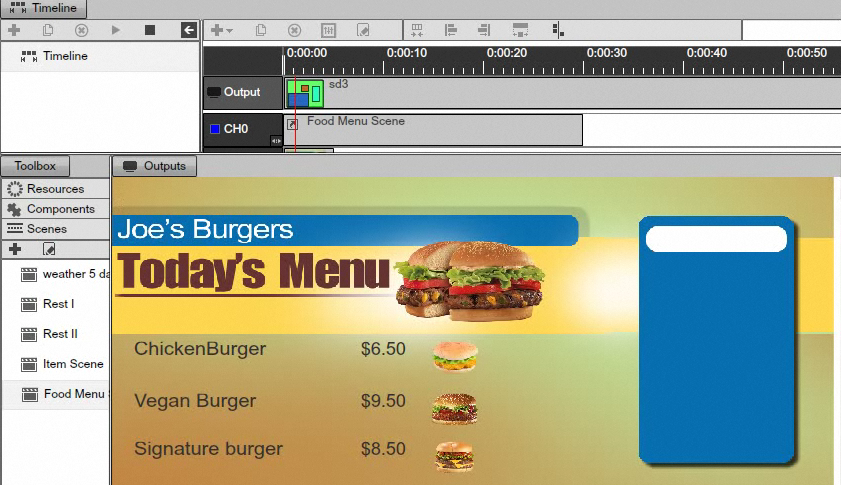
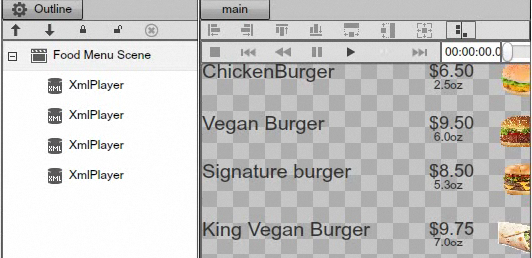
Next, click on the Play button and view the presentation containing theproducts linked to the external XML file.
|
|
|
|
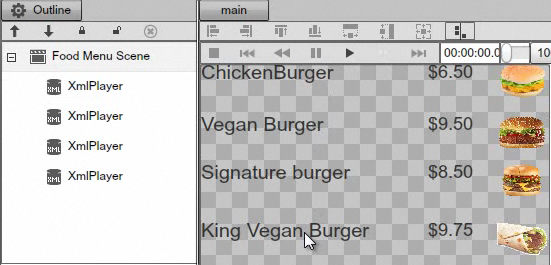
The XML component really shines when you need to add or remove things. Forexample, right now we have three products in the Scene.
|
|
Let's say you want to add a fourth product to the Food Menu board. Thiswill be easy to do because we have the layout in place, so all we need to dois go to the Components, add another XML player to the Food Menu Scene,associate the item Scene, set the Url and the Item path for the respectiveproduct. This process will add another product just below the last one added.Our scene was setup with a Vertical layout and so no special alignment isnecessary when adding additional XML players to the wrapper scene.
|
|
Now, let's go ahead and add the ounce (OZ) next to the price of eachproduct. In order to do this, go back to the Item Scene, drag a new XML Itemand drop it into the Scene. Customize and position the item into the Scene andmake sure you add into the Field name the @OZ E4X statement. If you goback to the main Food Menu Scene, you will notice the new OZ data is nowadded.
|
|
Now you can really appreciate the flexibility of the XML Component as itallows you to grab data from external sources. Also, working with the XMLPlayer will save you time as any changes made to the Sub Scene (in our caseItems Scene) will simply propagates throughout all the products added to theMain scene (in our case Food Menu scene).
Copyrights MediaSignage© Inc