PROOF OF DISPLAY
SIGNAGE STUDIO COMPONENTS
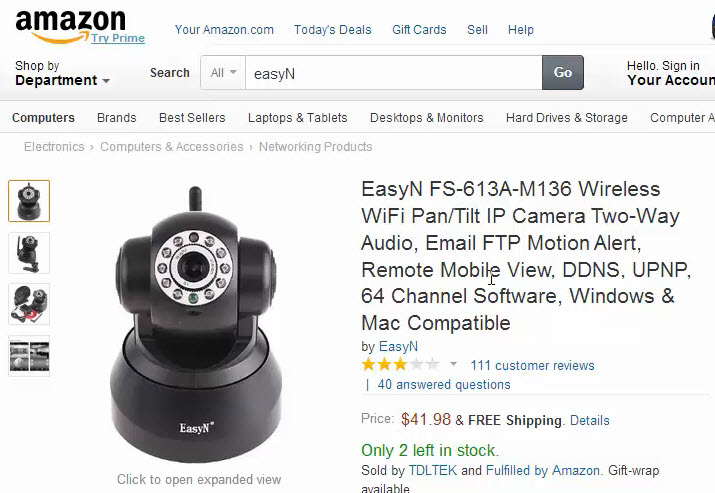
With Proof of Display, we are finally providing the real life solution that certifies the location where a signage screen is installed. With Proof of Display, a camera is installed at a distance from the Digital Signage screen. The camera snaps images if the installed screen at random times. It analyses a unique pattern to confirm the screen is running when and where is supposed to. This gives screen owners the ability to provide advertisers with a Proof of Display certification that can be cross referenced with their proof of play report. In other words, advertising agencies can now receive real assurance that their ads are players when and where they are supposed to. And it also provides you with a snapshot with the TV and the campaign at one Go. In order to use the feature, you need to use a compatible IP camera, in this case we will be using the EasyN camera.
|
|
So first you have to plug in your camera, and connect it to your network so you can have an IP address. You then load the camera utility that comes with the install software. Once you have the camera installed you will access the IP address. You can see that we have one camera online.
|
|
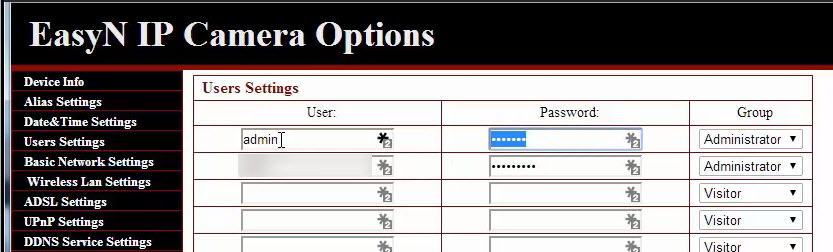
The setup will ask you for your Username and Password. The default username is Admin and there is no password.
|
|
Next you set up the IP camera. You can do that by clicking the option button right here.
|
|
Next you will see a screen with details of your camera. Make sure you assign a password to the Admin username.
|
|
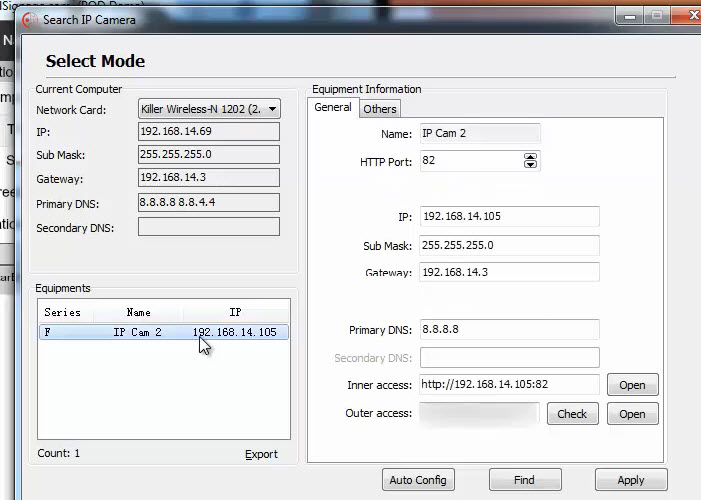
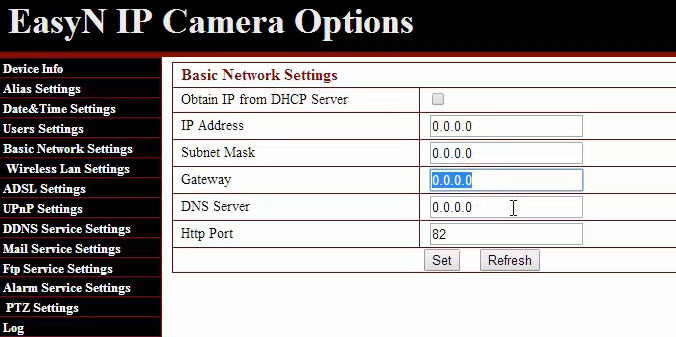
Next you need to set it up with s static IP so it does not keep changing. So you can provide the system with an IP, subnet mask, gateway, etc.
|
|
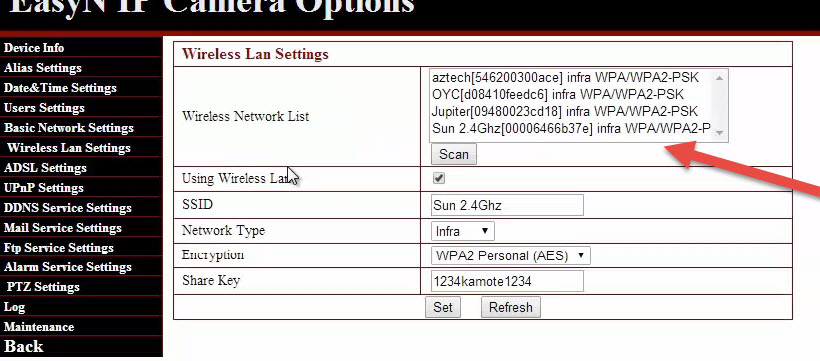
If you plan to select the Wi Fi options, you can choose your access point.
|
|
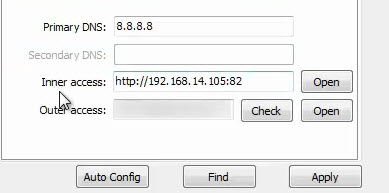
Now back to the search IP camera interface. You will notice the Inner access.
|
|
Back to the Signage Studio, you have to look for the Station you want to assign the camera to. Select the station and use the camera option. As you can see we have the preset url and the snapshot url.
|
|
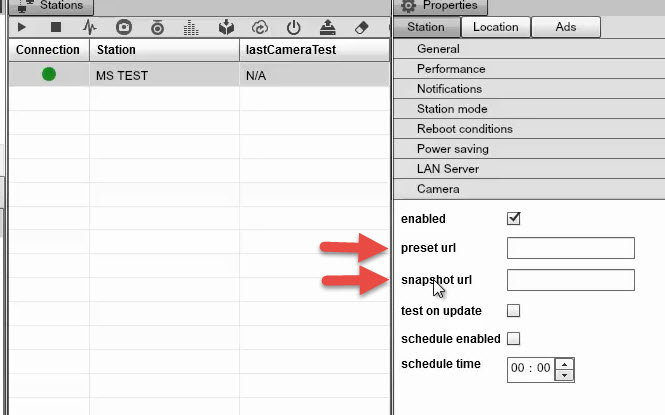
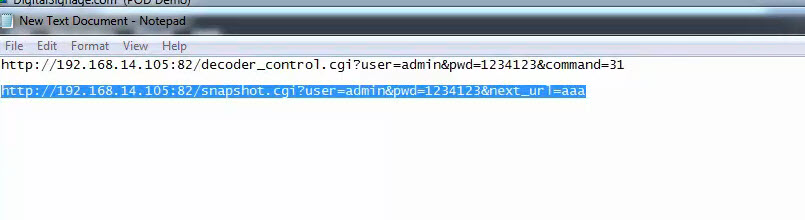
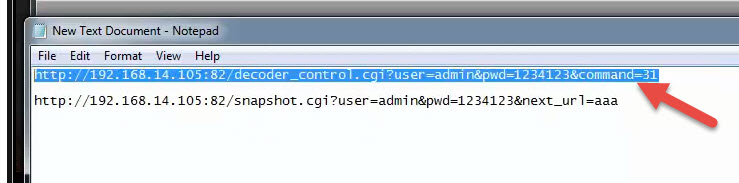
You need to use this particular sequence. For our address you can see we are using the IP address and the port that was assigned to it.
|
|
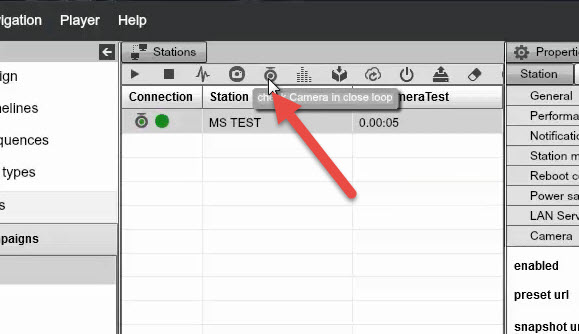
Paste the address and use the check camera in close loop option.
|
|
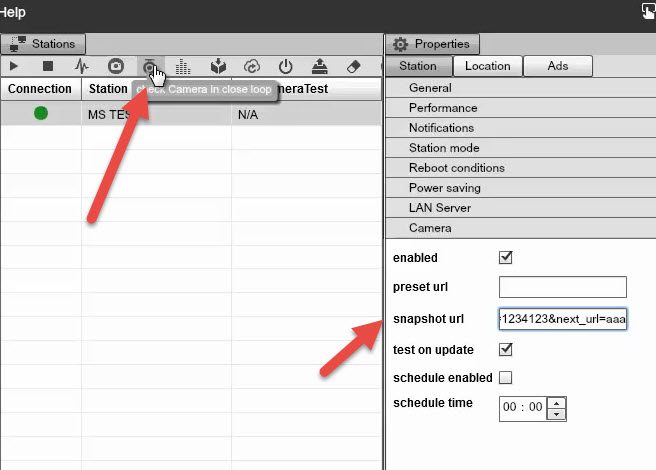
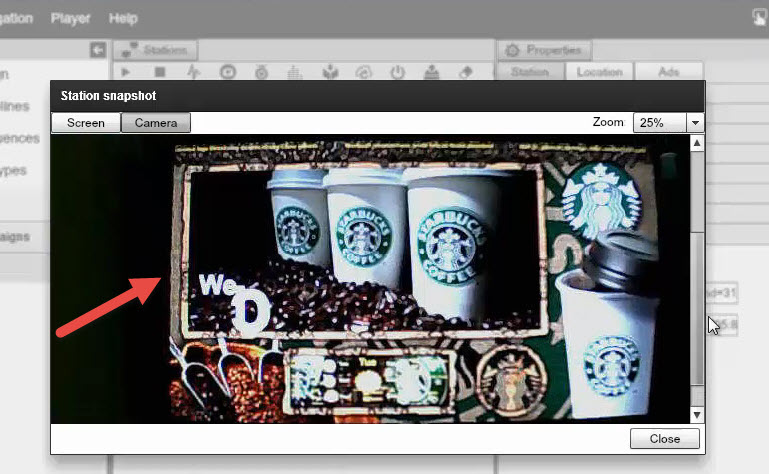
Close Loop means that it is in the same network. After that you will see the Campaign flashing black and white first for a few seconds and when the test is complete you will see a new button right here.
|
|
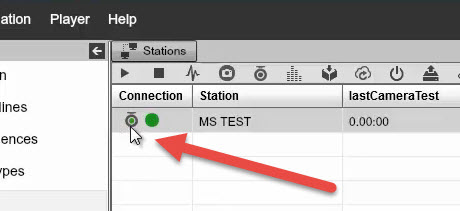
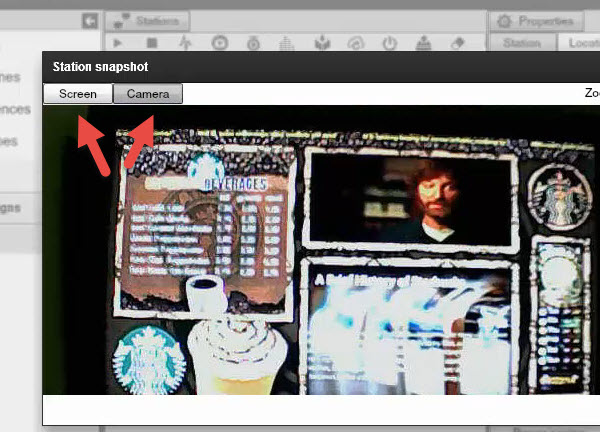
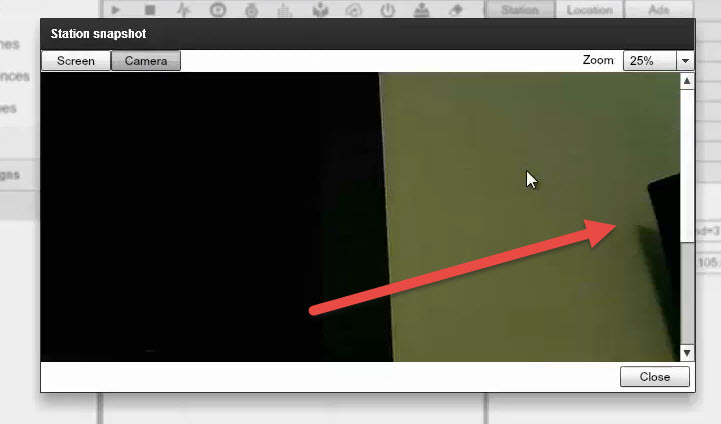
Now it’s green which means that the close loop test went fine. You can also do a snapshot either from your screen or camera.
|
|
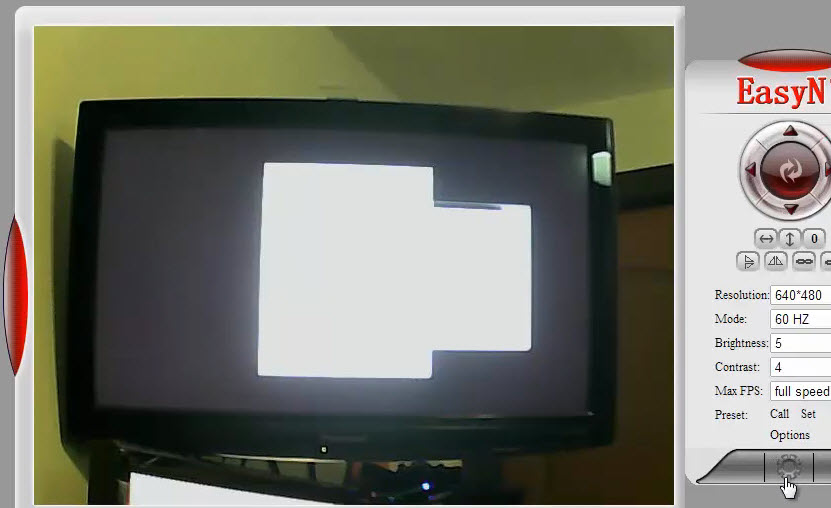
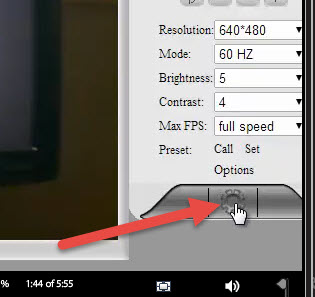
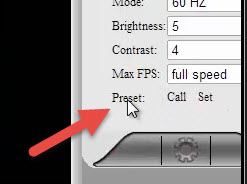
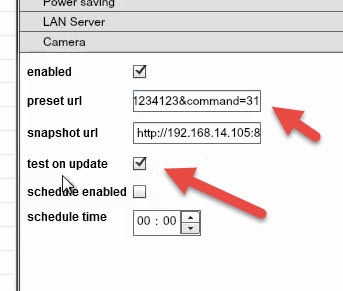
Also you will notice a few options in the camera properties. One is the Snapshot URL, the other is the Preset URL. Because when you are working with the IP camera, sometimes the camera gets restarted. So what you need to do is configure it in such a way that it resets for one preset config so every time you try to do a screen capture it will move it right there. We are going to set the Preset to 1.
|
|
|
|
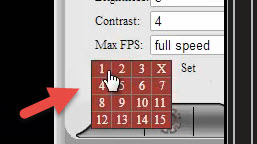
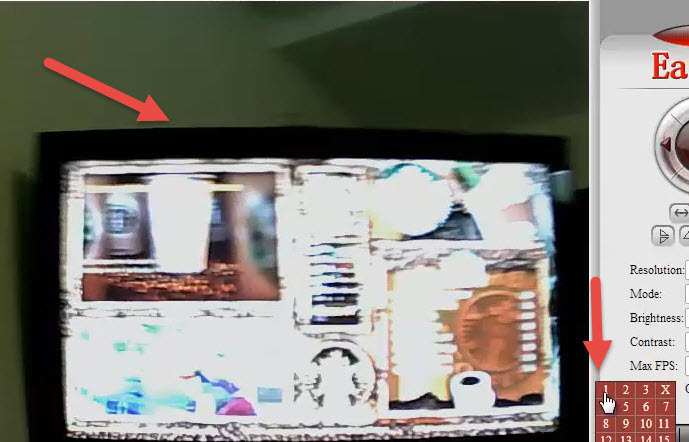
We can test now by moving the camera and then click on 1 so that it refocuses to the TV.
|
|
|
|
So when you do that, make sure you use this URL code, that is very important.
|
|
So paste the address and check test on update so it makes sure it works.
|
|
The schedule enabled allows you to enable the system to test the camera at any time. For our example we will set it to test it at 02:00 Am every day. So the system will test that the camera is pointing to the screen at 2 in the morning.
|
|

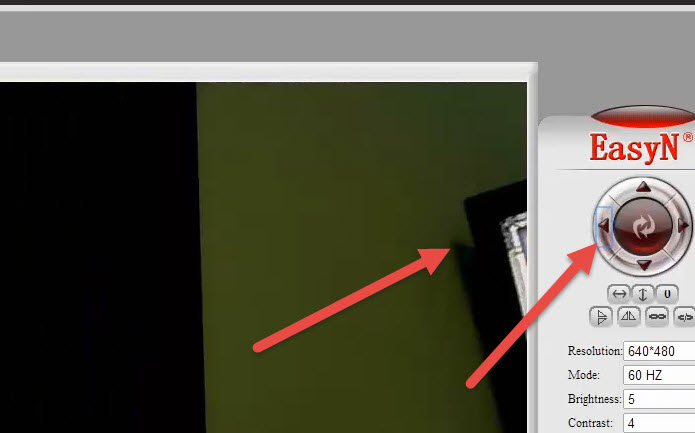
As a test we will move the camera out of focus once again.
|
|
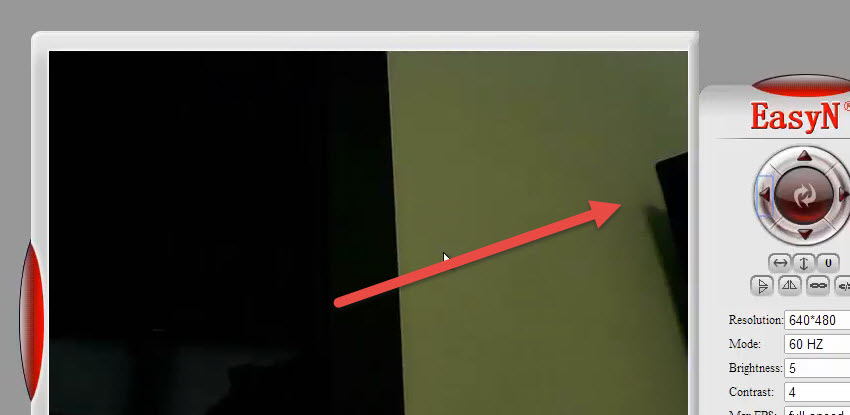
Then we will do a test and capture camera. As you can see it is not in order.
|
|
But when you check camera in loop, everything gets back to normal.
|
|
|
|
Copyrights MediaSignage© Inc