mediaSERVER Install and Setup Guide
MEDIA SERVER CONFIG
In this Chapter we cover the process of purchasing, licensing, installing and configuring the dedicated mediaSERVER.
mediaSERVER minimum requirements
- Dedicated Computer / Server running on a Dual Core 2.7GHz Desktop Intel processor or better. Keep in mind that the faster server and more memory you get, the more responsive your server will be and the more stations it will be able to manage.- A clean install of Microsoft Windows 2008 64 bit Server English version. Microsoft has different versions of the 2008 64bit Server and any version of will work just fine.
- Latest service packs installed
- Internet information Server (IIS7+)
- 3 Static IPs (internet accessible for web management). If you are planning on running the mediaSERVER over a LAN, VPN or WAN and don't need web access you can use locally addressed IPs. However, if you want to run Players across the Web with internet control you will need to purchase 3 static IPs from your internet service provider.
- 3 Prefixed domains (e.g. master.yourdomain.com, business.yourdomain.com, socket.yourdomain.com). The domains can be locally mapped through the /etc/hosts file or from a local DNS server for private LAN, WAN and VPN integration. However if you wish to have the mediaSERVER as web accessible you will need to map the prefixed domains through a public DNS server.
- A mediaKEY USB device with one or more licenses. The mediaKEY is license authentication dongle that must remain plugged-in to your mediaSERVER at all times. It holds the licenses and provider authentication for the mediaSERVER. Additional licenses may be purchased and downloaded to the USB mediaKEY at any time.
PURCHASING THE MEDIA SERVER
To purchase the mediaSERVER solution go to the mediaSERVER order pages
Enter your information on all the fields to place the order and be sure to make a note of your user credentials as you will need them to install the mediaSERVER.
|
|
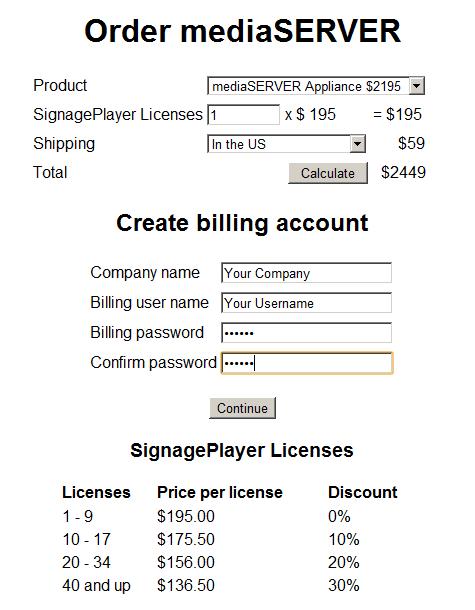
Click on the Continue button to view the Billing and Shipping page.
|
|
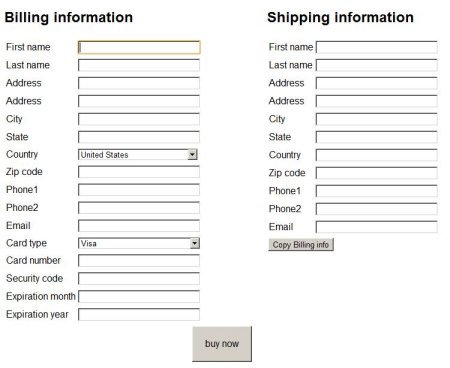
After entered the information, click on the buy now button to complete the purchase. Once the order completes successfully, you will receive a confirmation message.
|
|
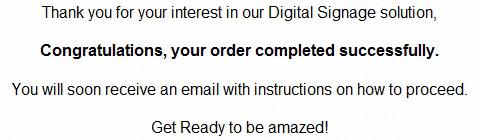
MediaSignage will ship the mediaKEY that holds your license count. The mediaSERVER software is downloaded and installed on any Windows 2008 64bit Server, however you need the mediaKEY dongle to begin the installation process.
INSTALLATION AND SETUP
Before you begin the installation process, make sure you LOG IN to your Windows Server 2008 64bit server as the Administrator . If you are just a regular user that is part of the Admin group you will not have sufficient rights to do a proper installation. The installation may go through, but some registry settings will be missing; be sure you are logged in as Administrator.
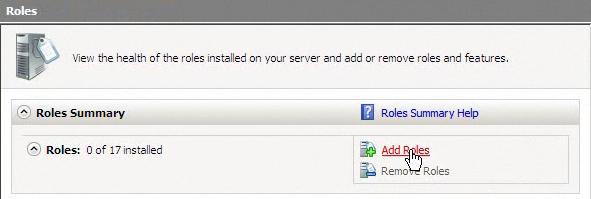
The mediaSERVER software is installed on a clean Microsoft Windows 2008 server. Install Internet Information Server (IIS7) which is Microsoft's Web Server.
- 1. Open the Service Manager open Roles and click on the add Roles.
|
|
- 2. Add Web Server (IIS)
|
|
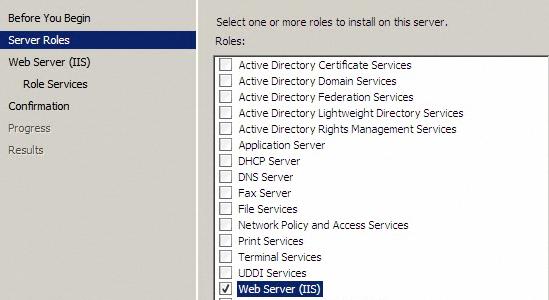
- 3. Click on Next and under Role Services make sure you check the ASP .net option.
|
|
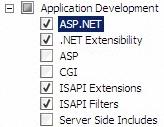
Click on the Install button to kick off the installation of IIS7
|
|

Proceed to download the mediaSERVER software installation toolkit
After you downloaded the .exe file, begin the installation process. Be sure to plug-in the mediaKEY prior to installing the server.Otherwise you will see an error:
|
|
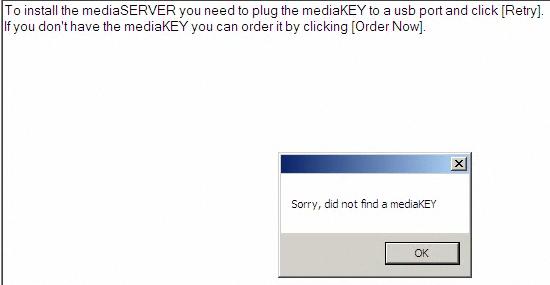
The mediaKEY USB dongle must remain plugged in to the Windows Server at all times; during the install process as well as during server operation.
Note: The mediaKEY is NOT a storage device, if you try to access the mediaKEY through the Windows File Manager you will receive an error indicating the device is not readable. The mediaKEY is a sophisticated authentication peripheral with built in CPU and memory.
|
|

After you plug-in the mediaKEY USB device, and kicked off the server installation process you will be prompted to enter your Provider credentials (same info picked when purchased the mediaSERVER online).
Next, pick new ProviderStudio and Database account credentials.
|
|
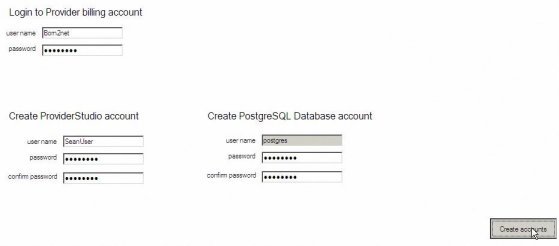
Click on Create accounts. In the next dialog enter 3 prefixed domains. Configure the server with 3 Static IPs:
- 1. Access the Control Panel
- 2. Open Network and Sharing Center
- 3. Go to Manage Network Connections
- 4. Open the Local are Connection interface
- 5. On the Local Area Connection Status window click on Properties
- 6. Open the Internet Protocol Version 4
This is our first Static IP:
|
|
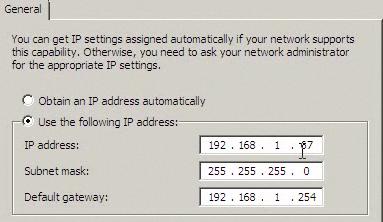
This IP address is a proxy IP (internal network only), and not a real IP that is addressable from the Web. Thus this mediaSERVER cannot exist on the internet (unless you configure special NAT firewall mapping rules).
If you do want to provide services to SignagePlayers across the web, the IPs must be static (contact your ISP for more info and prices).
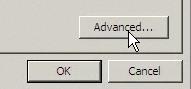
To add two more IPs, click on the advanced button, in the same dialog.
|
|
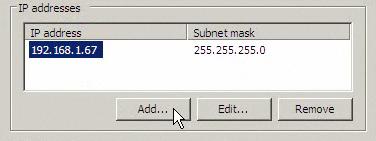
Add two more IPs using the Add button.
|
|
|
|
The next step is to enter the subdomains in the installation dialog and click refresh.
|
|
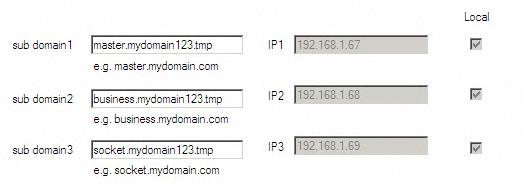
The 3 IPs resolved successfully to their corresponding prefixed domains, marked by the 3 checkboxes.
Click Continue to go to the next window.
|
|
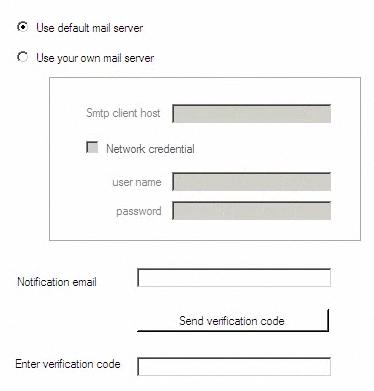
Configure notification emails. The mail server is set up to send an email every time a new account is created, so the user can verify the account using a verification link.
You can use your own mail server or use our mail server, to generate these emails. We will use the default mail server. If you choose to use the verification email process, you must first enter your own email address and can click on the send verification code button to verify your email account.
You can also skip the process altogether and not enforce email verification (recommended).
Next press Continue to proceed with the installation. The installer takes care of all the libraries, SQL database, IIS setup and registry settings.
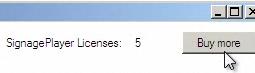
On the top right corner you can view the total number of licenses purchased. Use the Buy more button to purchase additional licenses and download them dynamically to the mediaKEY (over the web).
|
|
Once the installation process is complete, you can use the Check for new updates button to contact the MediaSignage server and check for new software releases.
Next install the SignageStudio and SignagePlayer as well as Adobe Integrated Runtime.
|
|

Remember that all computers running SignageStudio and SignagePlayer must be able to resolve the prefixed domain names to the 3 IP address bound to the mediaSERVER. We recommend that you initially disable the firewall on the mediaSERVER to confirm connectivity; once everything is working fine you can tighten up the security of the mediaSERVER.
If you are having issues connecting to your mediaSERVER from remote computers, we advise that you also check your network firewall rules.
The mediaSERVER supports both LIVE Sockets as well as HTTP Polling. To check which type of connection is used, register a SignagePlayer Desktop version and go to SignageStudio > Stations, you may get 3 color indicators:
Yellow: connected via PollingGreen: connected via live socketRed: not connected at all
To allow access to your mediaSERVER server be sure to open port 80 for both SOCKET and HTTP type traffic to the destination of your prefixed domains.
Be sure to watch the Firewall video tutorial for more info on this subjects.
SIGNAGEPLAYER AND SIGNAGESTUDIO SETUP
Next we will configure the SignagePlayer and the SignageStudio Desktop versions to work with your private mediaSERVER.
In our example we use Windows 7 PC for both SignageStudio and the SignagePlayer.
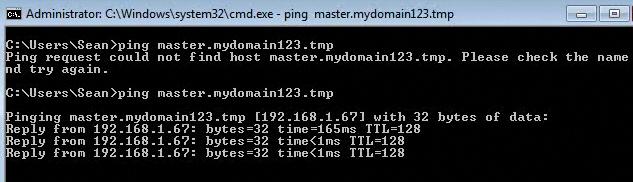
First thing to check is accessibility to the mediaSERVER. Open the Windows 7 command line window (cmd.exe) and ping all 3 prefixed domains to verify connection.
|
|
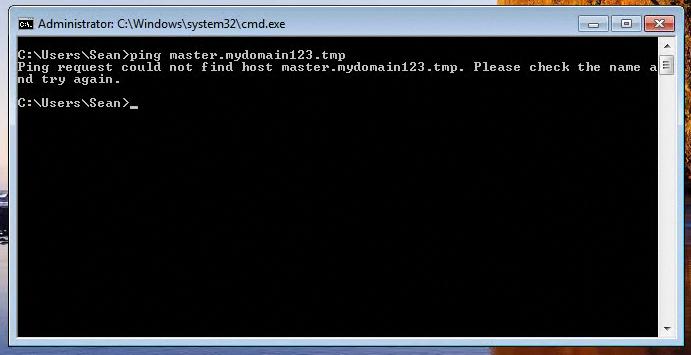
As you can see, the ping operation failed as Windows was unable to resolve the prefixed domain to an IP address.
If you use a mediaSERVER online and your domain names are web addressable you can skip the following step.
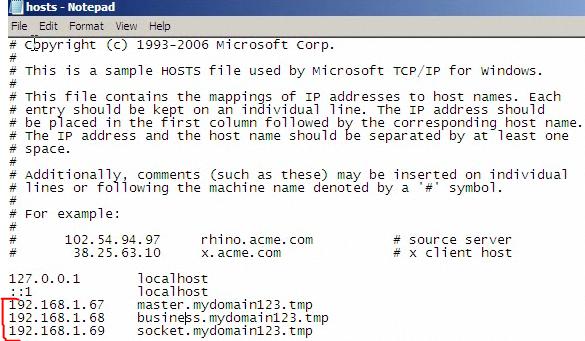
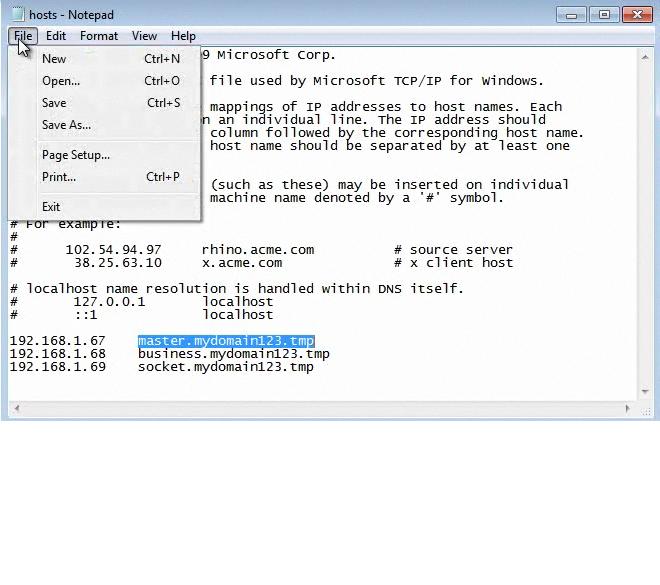
However in our example the mediaSERVER is installed locally within our own network, so we need to edit the hosts on each PC and add all 3 prefixed domains.
Open notepad.exe to c://windows/system32/drivers/etc/hosts, add the 3 prefixed domains / matching IPs and save the file.
|
|
Repeat the ping process.
|
|
Proceed with installing the Adobe Integrated Runtime .
Next install the SignageStudio and SignagePlayer from:
|
|

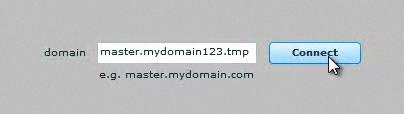
Change the "mydomain123" with your prefixed domain name.
On the SignageStudio dialog, enter your master domain and click Connect.
|
|
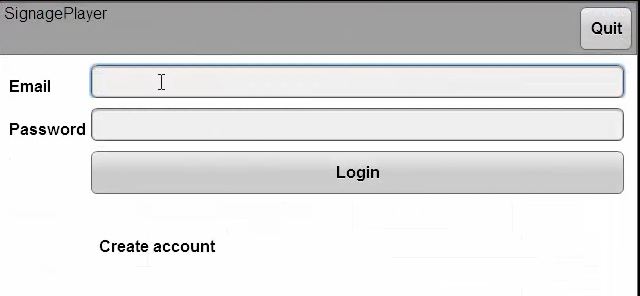
Next, provide the Login user and password for the SignageStudio. These will be the username and password that you picked during the server installation process. Once you login you will gain access to the EnterpriseStudio (SignageStudio with Enterprise UI).
Next install the SignagePlayer Desktop version. Kick off the SignagePlayer install file and provide your master domain, just like as you did with the SignageStudio.
|
|

Register the SignagePlayer to a sub-account.
|
|
ADDING LICENSES
If you own a mediaSERVER and interested in purchasing additional licenses the Server licenses web page.
Login with your existing Provider credentials originally used to order the mediaSERVER, and click on the buy now button. The licenses will be downloaded directly onto the USB mediaKEY so you do not have to wait for anything in the snail mail. Proceed by clicking on the Check for new updates on the mediaSERVER installer application to apply the purchased licenses.
Copyrights MediaSignage© Inc