FORM COMPONENT
INTRO TO THE FORM COMPONENT
In this Chapter, we are going to discuss the FORM component. The Form Component allows you to easily create a Kiosk submission form so your customers can enter their information in that Form and submit it to a backend webserver. When a client clicks on the Submit button this information will be passed to the webserver where it can store the data and return back a string to the form so you can redirect the customer to another Scene and display a custom message.
USING THE FORM COMPONENT
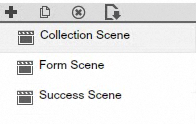
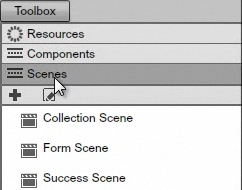
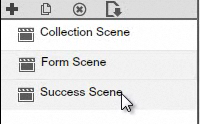
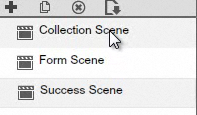
Let's precede and create our new form. First step is to navigate to the Scene editor and create a new Scene. We will rename the Scene Collection Scene. This scene will hold the collection so it will capture all the events for the form. Then we will add a second Scene and name it Form Scene. Finally, we will add one more scene and call it Success Scene. The Success Scene is going to be what the customer sees once he successfully submits the information to the server.
|
|
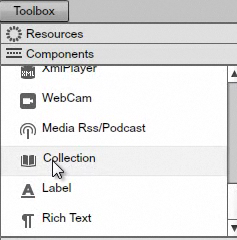
Now go to Components, drag the Collection component and drop it into the Scene.
|
|
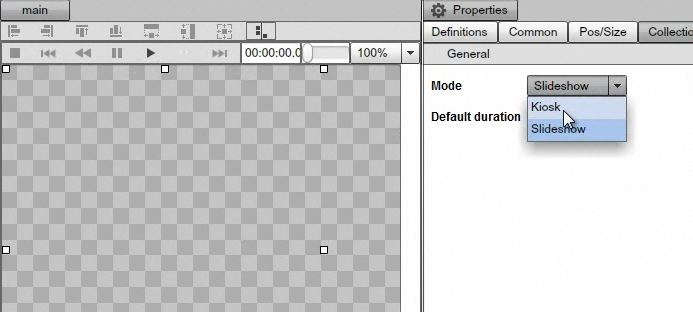
Once you dropped the Collection component, increase it's size so that it will cover almost the entire Scene and then set the mode to Kiosk in the properties panel.
|
|
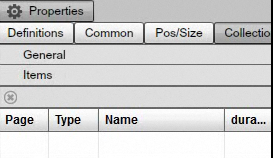
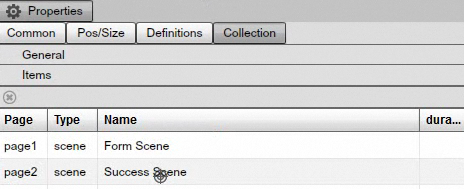
Next, we will need to associate the Scenes that we are going to use within this Collection. In order to do that, switch to the items in the Properties panel of the Collection component.
|
|
Next, switch over to the Scenes and make sure you use the Scenes under the Toolbox and not the main source Scenes.
|
|
Now drag the Form Scene and the Success Scene into the Items area.
|
|
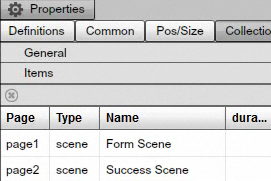
So we are associating both scenes as members of the Collection and the Form Scene is the default Scene (the first one associated).
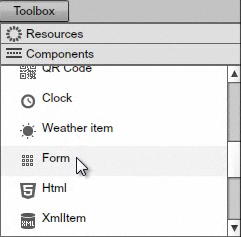
Next, we will switch back to the Form Scene in the main Scene area and edit it. Drag and drop the Form component into the Scene.
|
|
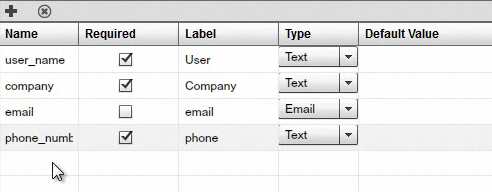
Under the Properties panel of the Form component, you will see the Items section. Open it and add four items by clicking on the + sign.
|
|
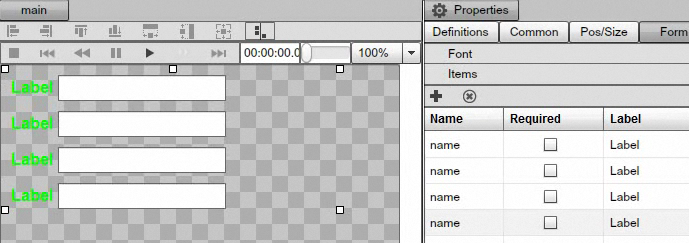
Now we will name each label.
|
|
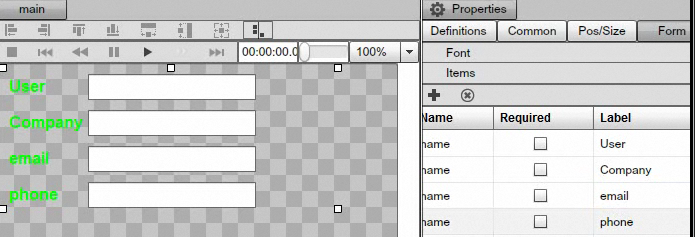
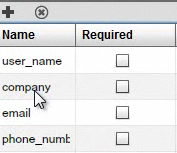
Then we will specify the field names that are going to be passed back to our webserver.
|
|
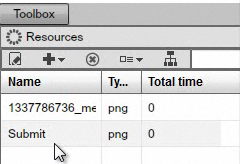
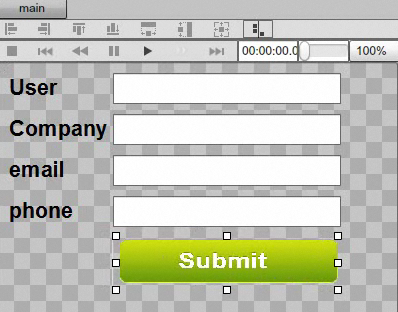
This filter will be passed to our webserver so we can process the data. Next, add the Submit button. In order to do that, go to Resources and then drag and drop a .png image into the Scene, this image will act as the Submit button.
|
|
|
|
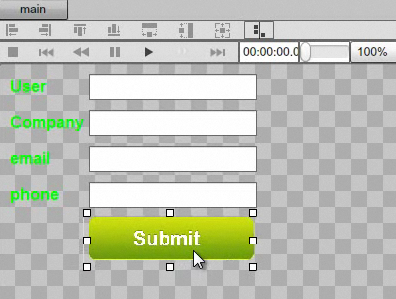
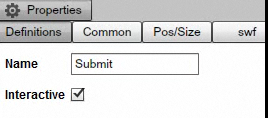
After you've added the Submit button and positioned it inside the Scene, under it's properties panel set the name and check the interactive option so it will be a clickable object. We will set the name to Submit.
You can of course change the color of the fonts, the size, and customize the scene anyway you like.
|
|
|
|
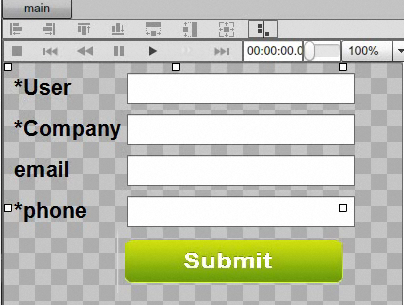
Under the properties panel of the Form, under the Items tab, check the require checkbox for the User, the Company and the Phone. These fields will be required fields. Set the type for the email field as Email so that Text entry box will be checked for a valid email format. The other will be text.
|
|
You can tell that the required fields are marked with an * so that customers can identify the field must be entered.
|
|
Next we will set up the Form with a target URL to submit the information to. First we will select the Form with the mouse and under its Properties we will click on the Events tab and click on the + sign to add a new event.
|
|
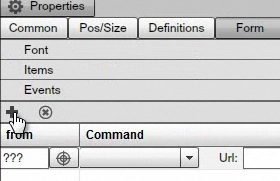
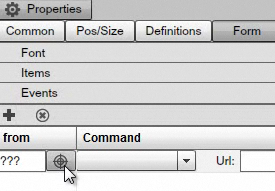
Here we will need to associate the Submit button. First, use the mouse hold down and drag the target sign over the Submit button.
|
|
|
|

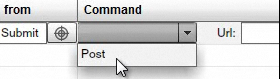
Next we will select Post .
|
|
And we will also paste in the URL where we will be sending the information to. Finally, we need to look for a success string. A success string is any particular string that we are going to look for to know that the information was successfully submitted. We will call it SUCCESS but this can be any string that you want as long as this string is available within the HTML page that will be generated once the page is submitted.
|
|

Keep in mind that this URL can be both the webserver as well as a standard HTML page as long as you supply all the required fields for the HTML. And we do support hidden field so if you supply additional field you use almost any pre-existing HTML form.
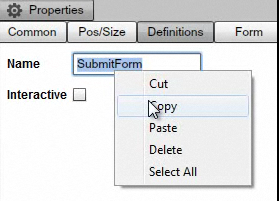
The last thing that we are going to do in the Form Scene is to associate the actual Form with a unique identifier so we can receive events from it.
Select the Form and click on the Definitions tab in the Properties panel. We will enter Submit Form into the name field. Keep in mind that this name will be the identifier to receive events when this form is inside the Collection. So let's go ahead and copy it.
|
|
Next, we will complete our Success Scene, which is what the customer will see once he submits information.
|
|
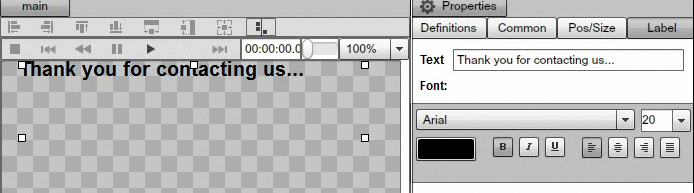
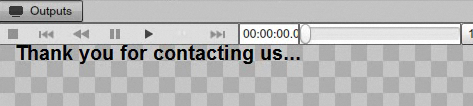
We will add a Label component and customize it so it is a simple Success message.
|
|
Now that we've completed our Success Scene and the Form Scene let's switch back to the Collection Scene.
|
|
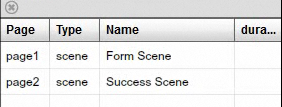
We can now see the Form inside the Collection since this is the Default Scene, or page1.
|
|
Now create a new event to capture the Submit click. Go to Events, add a new event and paste in the Form Name that we've copied earlier and tell it to go to a specific page from the Next page dropdown, choose Selected page.
|
|
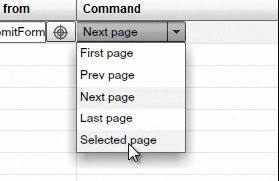
Again hold down the target and select the Success page.
|
|
This completes the association and completes the Form. Let's go ahead and test it.
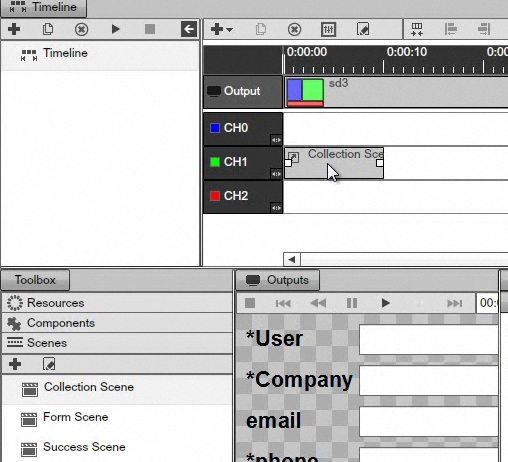
Switch to the Timelines and from the Toolbox drag the Collection Scene and drop it into the Timeline.
|
|
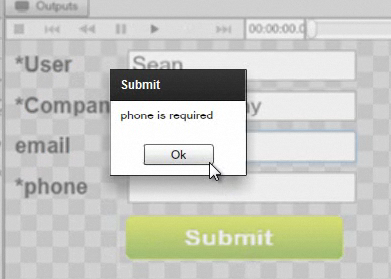
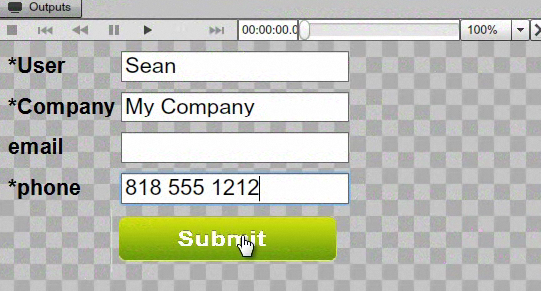
Double click to load up the properties, type some text into the fields. If we leave the Phone field empty we will get an error message, since it is a required field.
|
|
Before we submit the information to the server, let's take a look at the back end webpage that get's generated from the URL we pasted in. This is nothing more than a standard HTML page that get's generated but we do have a Success string embedded in it.
|
|
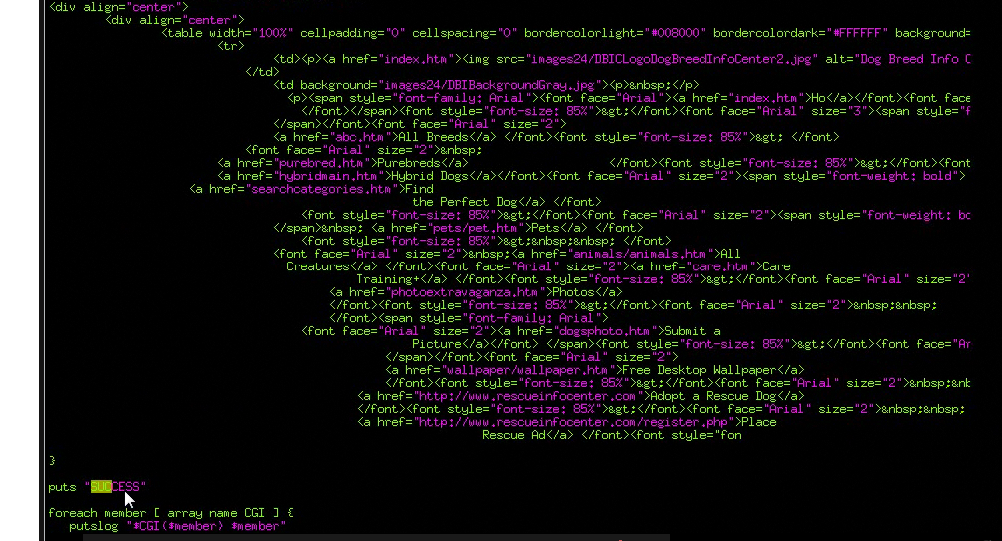
The success string can be any string that we've embedded into the webpage and so once our form receives the Success string the form will know that everything was successfully processed by the server and it can go ahead and proceed to the next Success Scene. If the information that was submitted trough the Post doesn't meet the Service criteria you simply don't return a Success string and so the User will not get directed to the Success Scene.
Let's type the Phone number now and click on the Submit button.
|
|
And we are redirected to the Success Scene.
|
|
The Form component and its interactivity function is useful in getting information from customers thus creating a customized info collection portal.
Copyrights MediaSignage© Inc