Files and Resources
WORKING WITH RESOURCES
Resources are files you use to build your SignageStudio presentation. There are two categories of resources:
-Internal Resources
-External Resources
The internal resources are files copied to the MediaSignage servers. These files will stream down from the server and get locally cached at the player side. If the player loses internet connectivity, the resource will still play with no interruption in playback.
The external resources are files residing at external repositories, like a web server. You can link to these external files and use the files to build your SignageStudio presentation.
The main difference between the external and internal files is the internal resources take advantage of our caching system; which means; whenever these resources are played they are downloaded and cached in SignagePlayer. If the connection to the server is interrupted, the internal resources will continue and play.
The external resources are not downloaded onto the MediaSignage server; therefore they are not cached. However, in some circumstances it is easier to work and swap external resources.
MediaSignage officially supports all of the Flash Media formats which include Video Formats:
-Flash video FLV (H.263)
-MPEG-4 (H.264)
-MOV
-M4A
-MP4V
-3GP
-AAC (HE, LC)
-SWF
We HIGHLY recommend you use FLV (Flash Video) with H.264 encoding as it supports hardware acceleration and will run on the GPU (not CPU) and give the best performance.
-Animation: SWF
Flash CS can produce SWFs. SWFs are vector based and are rendered on the CPU, thus they are highly CPU intensive, especially when running high res.
-Images: JPG, PNG, JPEG, GIF
-Sound: MP3
However, you should note, due to the hundreds of different encoders available today, it is possible some of your files may not run properly. For this reason, we recommend you use a Freeware utility like Super to convert your media files to standard format including FLV, PNG or SWF. This eliminates any encoder / decoder issues you may experience. You can read our conversion format document at the link below:
-PowerPoint presentations (ppt)
Microsoft PowerPoint Viewer is also supported, but it does have some limitations as it requires full screen and licensing from Microsoft.PowerPoint does come with some limitations, if you use it in a screen division smaller than full screen, the ppt may get cropped starting at x 0 y 0 to the total width and height of the screen division. So in order to achieve proper PowerPoint playback, you'll need to create a screen division and draw a region to cover the entire screen's width and height.
FILE CONVERSION
We recommend you use a PPT > SWF convertor (PowerPoint to Flash converter).
You can also download a free file conversion utility at:FreeMake file convertor
You can also checkout the PowerPoint video tutorial here:Go to MediaSignage
RESOURCE PANEL AND PROPERTIES
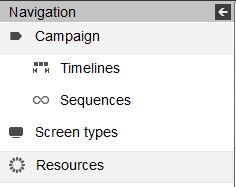
The resource panel is where you upload and organize your files inside. This panel can be viewed by left clicking the "Resources" button from the main Navigation menu.
|
|
After you click on the "Resources" button from the main Navigation menu, you'll see the Resource's panel located by default on the right side. It contains several icons.
|
|

-The first icon is the upload button.
|
|

If you left click on the upload icon, you will be presented with a dropdown menu with four options for uploading your files.
|
|
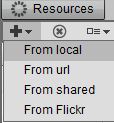
-The first option to upload files is "From local"
|
|

This option allows you to upload supported file formats from your computer to the server. If you choose this option, a new dialog box opens, and you'll need to select a file from your machine. You can use the "File Type" option so the search window will only display certain types of files (depending on your selection). Also you can choose the "All files" option to show all.
|
|

You can select multiple files by holding down the Control key (or Command on Mac). After you have selected your files, click "Open."
After you've selected the files and clicked "Open" you'll see the selected files in the Resource's panel, along with some of their properties. We will cover the resource properties later in this Chapter.
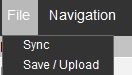
To begin the upload process of your selected files onto the server, you'll need to choose FILE --- > SAVE (upload) from the main Menu, located on the upper left corner of the SignageStudio.
|
|

-The second option to upload files is from URL (i.e.: across the web).
|
|

This option allows you to upload files from a web address. If you choose this option the URL selector dialog box will appear.
|
|

You'll see two fields in the URL selector window. The first field is named "URL". In this field you enter the name of the source of the file you want to upload.
The advantage of using this option is resources are downloaded to the server from the location entered. These files will take advantage of the caching system; that is if the connection between the SignagePlayer and the server is lost.
The second field of the URL selector window is "Name". Use this field to enter a name for the resource you are uploading to the server.
You also have the options to PREVIEW the file before uploading, click OK or CANCEL. If you choose OK, you'll need to SAVE (upload) the file first.
|
|

-The third option is for uploading files is "From shared". This option will allow you to choose files from the MediaSignage library; made public by other users. These files include a large repository of pre-loaded resources. After you choose this option a new window will appear.
|
|

|
|

Choose any file and press OK. Next click File > save (upload) to begin the upload process.
|
|
-The third icon in the main menu of the Resource's panel is the "VIEWS" button.
|
|

You also have the option to CANCEL the operation by clicking the Cancel button.
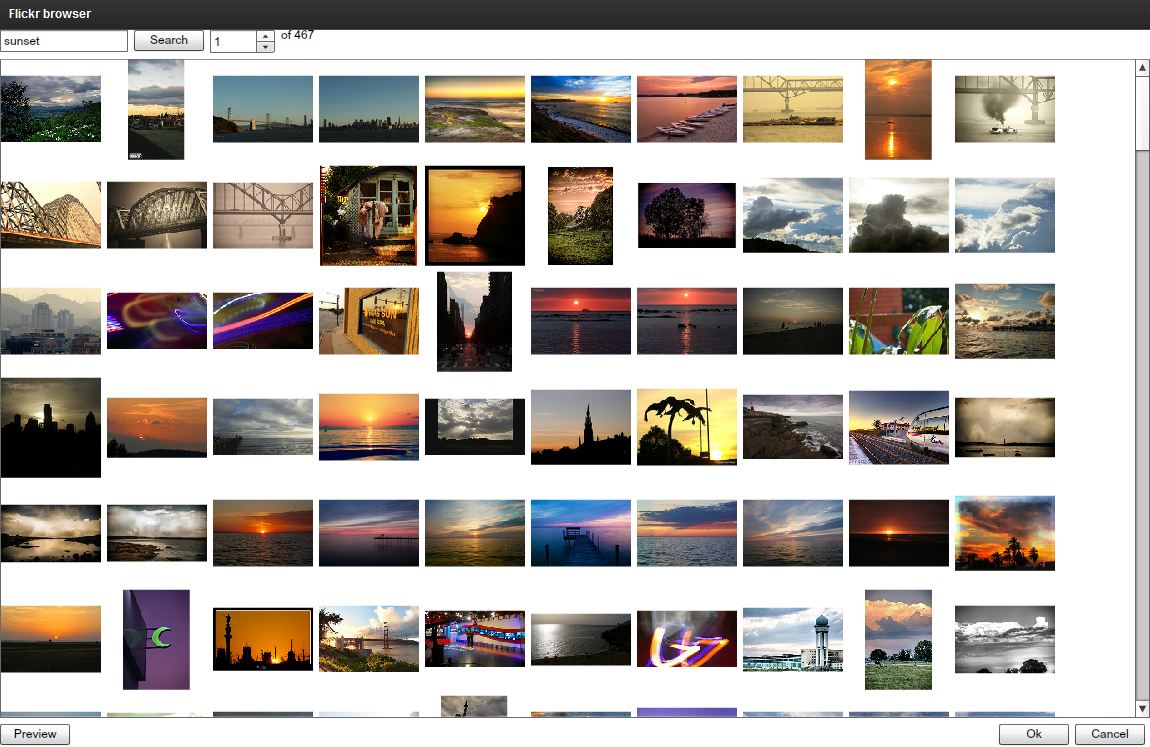
-The fourth upload option is "From flicker".
|
|

This option allows you to use images from Go to Flicker in your presentation.
In the search field located on the upper left corner of the window, enter a description. In this example we entered the word "Sunset" in the search field.
|
|
-The second icon in the main menu of the Resource's panel, next to the "ADD" button is the "DELETE" button.
|
|

If you select a resource from the list and click on the "Delete" button a new dialog box will appear asking for deletion confirmation.
|
|
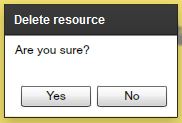
If you choose YES, that Resource will be permanently deleted from the server.
-The third icon in the main menu of the Resource's panel is the "VIEWS" button.
|
|
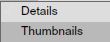
This button allows you to choose between two options for viewing / displaying your uploaded resources. If you click on the "VIEWS" button you have the option to choose either to view your Resources as DETAILS or THUMBNAILS. The Details view shows the name and certain properties for the resources. The Thumbnails view shows the icons or thumbnails of the uploaded resources.
|
|
-The fourth icon in the main menu of the Resource's panel is the "Columns" button.
|
|

This button is located next to the "Views" button and will allow you to show or hide columns of certain file properties. If you click on the "Columns" button you'll see a dropdown menu containing several options.
|
|
NOTE: Every resource property listed with a check mark next to it represents a column. You can check and uncheck the columns.
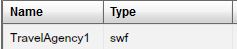
For example, we have a resource for which the Resource's panel will display two columns: Name and the File Type.
|
|
If we use the "Columns" button we can also add the Width and the Height.
|
|

If you click on any Resource Property the resources list located below will be sorted according to your selection. You'll notice a small arrow that appears on the property name that defines the sorting order.
|
|

You can click again on that property and the sorting order will reverse. For example, if you choose to sort the resources by Name, you can click once on "Name" and the resources will be sorted in an ascending order; click once more for a descending order.
The Resources search box is useful to help search for a file using its name or a partial string. The search box is located on the upper side of the Resource's panel.
|
|

PREVIEW PANEL
After you uploaded the files you can preview them using the Preview panel located at the right side of the Resource's panel. To preview a resource you'll need to left click on its name. The Resources preview panel has three options to allow control over the preview. These options are PLAY, STOP, and CAPTURE.
|
|

The first icon is the Play button.
|
|

The Play button allows playing of your video files or animations content, followed by the Stop button.
|
|

If you click on the Stop button, the video file or animation will stop playing. The third icon is the Capture button.
|
|

Capture allows you to create thumbnails or small icons of resources; which are useful when working with timelines. Timelines will be covered in the Campaign chapter. When you click on the Capture icon
|
|

a new window called the Icon Creator will appear.
|
|
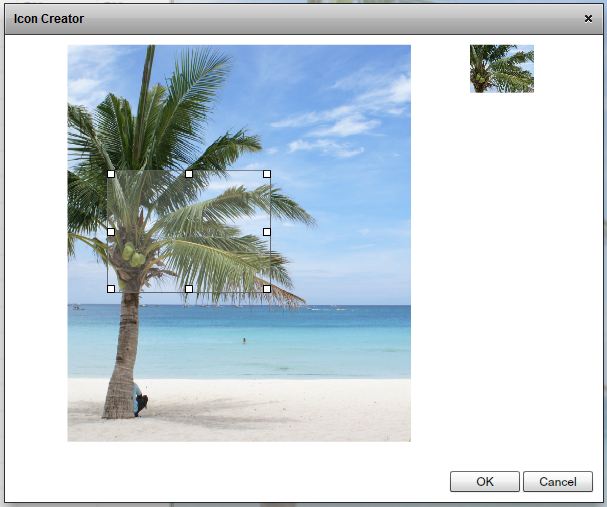
You will see a blue square with several handles as margins. You can move the square with your mouse and change its size before you click OK. The area inside the square will be CAPTURED and a small thumbnail will be created. You also have the option to CANCEL and EXIT the Item creator window.
Internal resources are the files uploaded to the server which include:
-Local
-URL
-Shared
-Flickr
These Resources take advantage of the SignagePlayer caching system.
External Resources on the other hand are files that reside outside the MediaSignage server farm and are linked to the SignageStudio and SignagePlayer. An external resource can be an external video, external swf's or images, as well as HTML web pages and other types of media.
Internal or external resources can be used in a Scene or directly on a Timeline. We will explain more about Scenes and Timelines later on.
RESOURCES PROPERTIES PANEL
The Resource properties panel is located on the right side of the application, next to the Resource preview window.
|
|
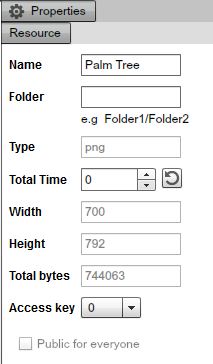
Use the "Name" field to change the name of a resource.
|
|
You do this simply by deleting the old name and entering a new one.
FOLDERS AND FILTERS
-The second field of the Resource properties panel is the "Folder" field.
|
|
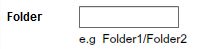
Folders are used to filter a specified list of items. In this field you can enter a new folder name and the system will create a New Folder. Also, it will make a reference of the selected resource in the filter / folder created. Folders are "slash" delimited; just like a file system in a PC.
|
|
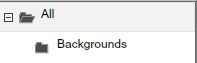
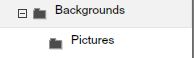
You can also assign one or more Resources to a Subfolder. To create a Subfolder, first select the resource in the Resource's panel. Next enter a "forward slash" on the keyboard "/" right after the Folder's name and add a name to the Subfolder. If we wanted to add a Resource to a subfolder named "Pictures," that will reside under the "Backgrounds" folder we've created, we will select the Resource and type in the "Folder" field: Backgrounds/Pictures. A new Subfolder named Pictures will be created below the Backgrounds folder.
|
|
You can delete one or more Resources at anytime from a Folder or Subfolder. To do so, first you SELECT the Resource, DELETE the name of the Folder or Subfolder in the Resource properties panel, and press ENTER.
All Resources assigned to a particular Folder will be listed under the "All" folder, which is the default Folder.
|
|

The filtering system uses folders to keep track of your files and enables the user to be more organized, especially when working with hundreds or even thousands of files.
You can use the Search option to search for a file under a certain Folder or Subfolder. To do so, select the Folder or Subfolder where you want to search and enter a string or part of a string in the search box. The system will search for your file only in the folder / subfolder you've selected.
If you want to add more resources to an existing Folder or Subfolder, copy the entire file path from a Resource already in that folder and paste it in the "Folder" field of the new Resource. There is no restriction as to how many Folders or Subfolders you can create.
You can Use folders with:
- Screens
- Campaigns
- Stations
- Scenes
- Incoming and Outgoing Ads
Managing Folders and Filters is an efficient way to keep things organized while working with SignageStudio.
|
|

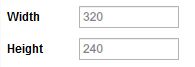
The fourth and the fifth fields describe the resolution of the selected file with respect to the Width and Height.
|
|
The next field displays the duration of video files. Duration is only recorded for certain video formats including FLV and MP4 formats that are encoded with H.264.
|
|

|
|

Access keys determine what privileges a user has with regards to certain areas of the SignageStudio; we cover it in another chapter.
Next we will cover the "Trust content" and "flex module" options.
The "Trust content" option will be visible in the Resource properties panel when you select a swf file.
|
|
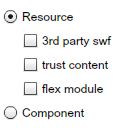
Swf resources are flash based files that can communicate with external web servers to pull live data feeds. If you check the "Trust content" checkbox, a small dialog box appears on the screen, informing you you've allowed the selected swf file to access external domains.
|
|

The "Flex module" refers to swf file created with Adobe Flash builder / Adobe Flex. This will allow for a Flex Module to be uploaded and work as a native resource within both the SignagePlayer and SignageStudio.
PREPARING RESOURCES
In an earlier Chapter we covered Screens and Screen Divisions. We mentioned that Screen divisions are used to define the areas on the screen where a resource or component will play. We learned that a Screen can have more than one Screen Division. Verifying and preparing a file before uploading it to the server will help you build a more precise presentation, avoiding the appearance of skewed images, pixelated videos, and failed transparency. There are several factors to keep in mind when creating content.
-Verify that the dimensions of the file you want to use match exactly the width and the height of the screen division the resource will reside in.
For example, if we want to create an image of 2560 pixels and a Height of 1600 pixels; we need to create a matching W x H screen division.
|
|

Looking at the referenced image, you can see that a screen division was created with a Width of 600 and Height of 800 pixels.
|
|
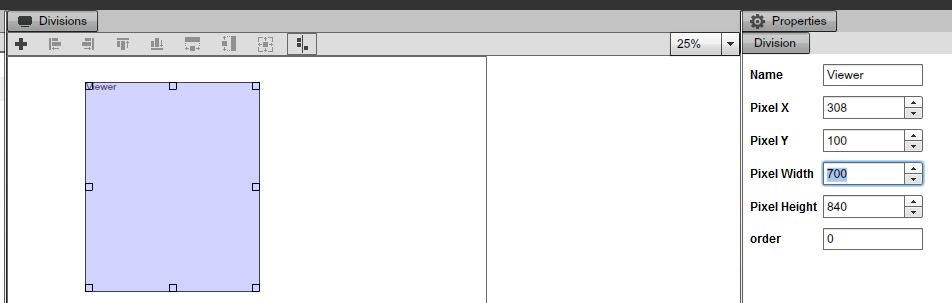
Because the Width x Height do not match our original image and the proportion of Width to height is not the same either, we will experience distorted and pixilated content. Thus, to prevent any mismatches between our file and the Screen Division, make sure to modify the W x H of the original image to match that of the screen division's W x H.
Occasionally, you'll find that resources look fine even if the resource and screen division do not match in size, especially when the original file and the Screen division have a similar aspect ratio.
You can use an Image or Video editing application to modify a resource's width or height.
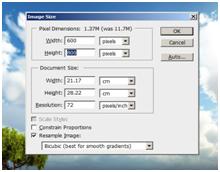
In our example we used Photoshop to modify properties of our image. After we inserted the image in Photoshop, we chose Image --> Image Size from the top menu and we enter the new values in the corresponding fields.
Note: Constrain proportions checkbox must be unchecked to modify the Width and the Height independently.
|
|
As you can see, the image is skewed and doesn't look good with the new size.
|
|

We choose EDIT --> UNDO from the main menu to undo the changes we've made to the image.
Next we will crop the image so it fits the size of the Screen Division. The disadvantage of using the crop tool is that certain parts of the original image will be lost.
To crop an image you use the crop tool located on the Photoshop tools panel, which is by default on the left side of the application.
|
|

After you clicked on the crop tool icon, you may insert the Width and Height values in the corresponding fields above.
|
|

Next mark a region of the image with the crop tool selected. Enter the values of 600 and 800 for width and height respectively.
|
|

Hit ENTER on your keyboard to complete the crop process.
|
|

Now the image size matches the size of the Screen Division. It will be viewed properly when the presentation is played back. Upload the image on the server and use it in your presentation. We'll be covering more on the use of resources to build a presentation in another Chapter.
- You should also be aware of the file size when preparing a resource for uploading to the server.
In Photoshop, use the Rectangular Marquee tool to draw a selection of 400 x 300 pixels. Position the selection as you wish and hit the DELETE key on your keyboard. This will make a hole in the image.
|
|
Save the file using the png extension. Upload the image and use it in your presentation as a Mask. Through the empty area you will be able see the lower Screen Divisions.
Always try to use smaller size files, as the upload process takes less time, and also your files will occupy less space on your media player. If you use Video files, try different encoding options to reduce total file size, but at the same time maintain a good quality video playback.
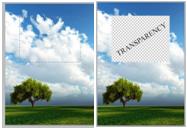
- Verify the transparency if using transparent png or swf files
The transparency feature in respect to Resources has an important role in building your presentation. The most common use of these files is in regards to backgrounds and masks. We explained in an earlier chapter, a background is the layer or the Screen Division that resides below all the other Screen Divisions, and it has the "Order" number in the layering or stacking with a value of "0." Masks on the other hand are used to hide certain parts of the Screen, and through the mask other Screen Divisions are viewed, making them visible thanks to the magic of transparency.
You can use many preloaded files with transparency available from the MediaSignage library. You can access these files using the UPLOAD option "From shared" as discussed earlier in this chapter. Be sure to check out the Background and Masks category for more examples.
Copyrights MediaSignage© Inc