SCREEN CHAT
INTRO
In this chapter we are going to talk about Screen Chat. Screen Chat allows your audience to communicate with one another via your Digital Signage screen. So what this means is that users that visit your business could scan a QR code on the screen, be redirected to a website where they can type in text and all this text will get inserted into a vertical scrolling list so everybody can see a history of the chat in progress. There could be many applications for this but one application is an auction that people simply can scan the QR on the screen and instead of just screaming their information out in there; they could type it in in their browser and submit it to the screen. So an auction is just one application. So let’s see how this can be setup.
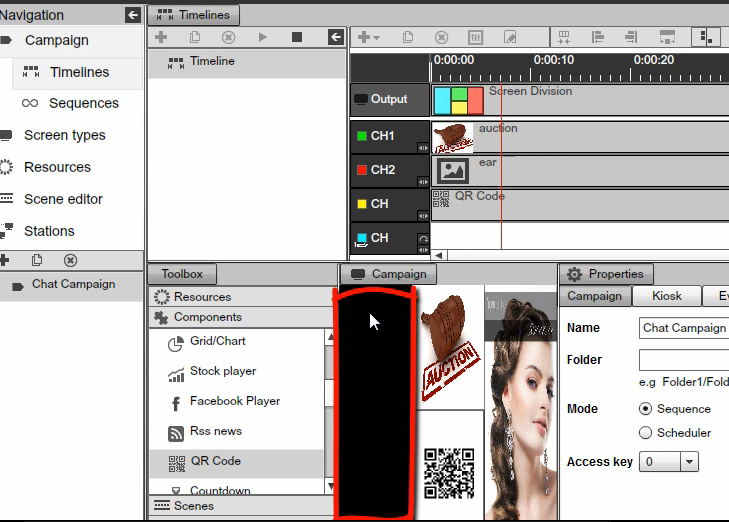
So here we are looking at the Signage Studio where we have sample presentation setup. You can see that we have an auction for some Ear Rings and we have a QR code and on the left side we are going to have our Chat Component.
|
|
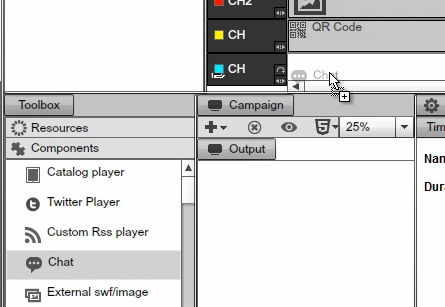
Next we will select the Chat from the Components and drag and drop that to the Common Channel. Keep in mind that we are using a Common Channel because we don’t want the text to get erased when this Timeline restarts.
|
|
Now double click and load up its properties. We will click on the + sign and add a new Event and we will just call it our Chat Event.
|
|
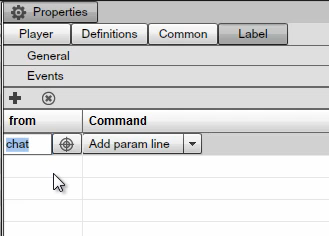
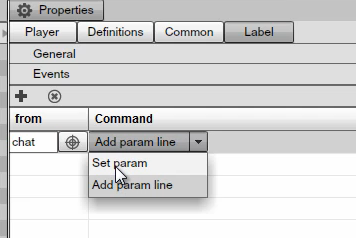
It can be any name as long as it matches the string on the JavaScript side and we will explain that soon. Now we are going to use the Add param because we want to keep the history. If you set the Set param what's going to happen is that any time somebody types text into the screen that text will overwrite everybody else's text and so you will only see the latest text that was typed. But we actually want to keep history and you wanted to scroll up and so go at and then select the Add param line.
|
|
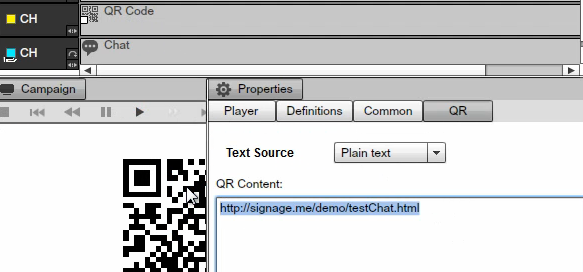
Next we will go at and double click the QR component and you will notice that we already pasted in an address and off course this will be your address and we will show you how this JavaScript file is setup but here you will type in your own address, where you want the people to be redirected on when they scan the QR on their mobile devices so they can chat one another.
|
|
So next let’s go and check out the presentation and see how it works. So here we can see the presentation, you can see a QR Code that as soon as somebody scans this QR Code on their mobile devices, they will be redirected to this page, in our case we have just setup a simple page.
|
|
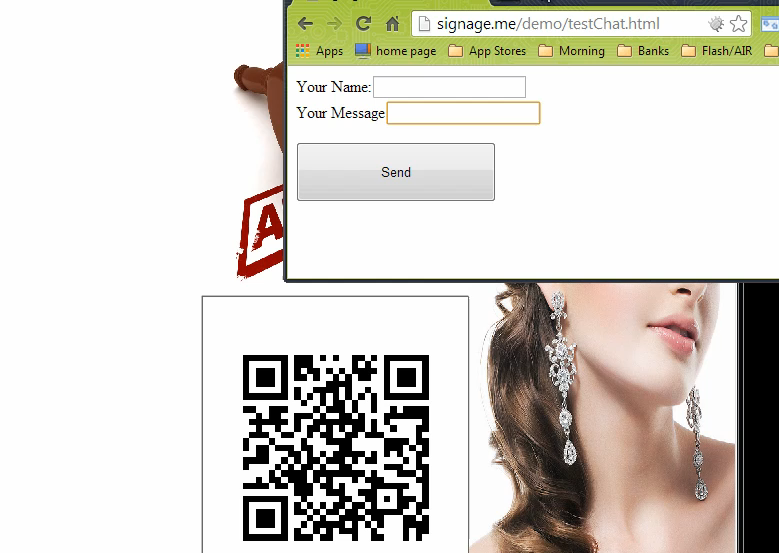
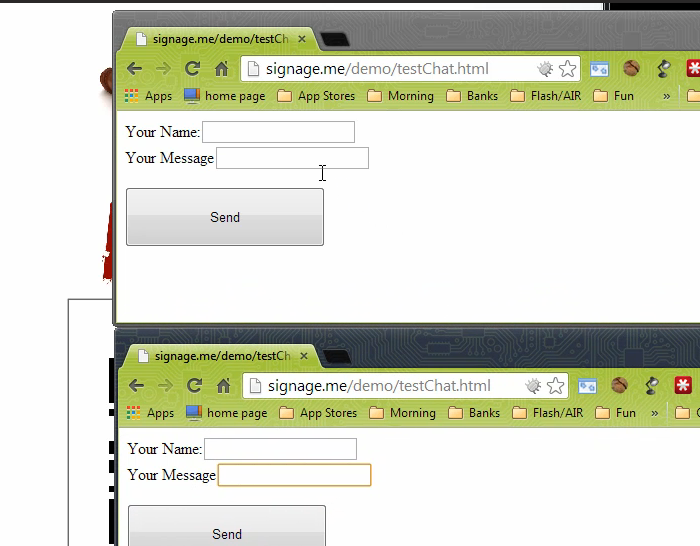
Imagine that somebody scan this with their Phone and they will be redirected into this page and maybe a second person came in because they are also interested in this auction and another page would pull up on their Phone.
|
|
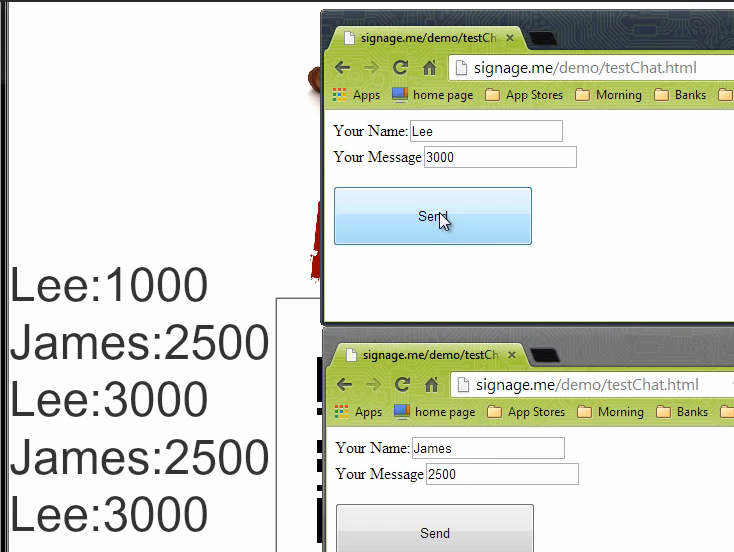
So maybe Lee says that he is willing to pay a 1000$ for these Ear Rings and he clicks on send. And then James is actually going to pay 2500$ and he will click on send and then Lee will up it to 3000$ and so you get the idea. Basically you can converse via the Digital Signage screen.
|
|
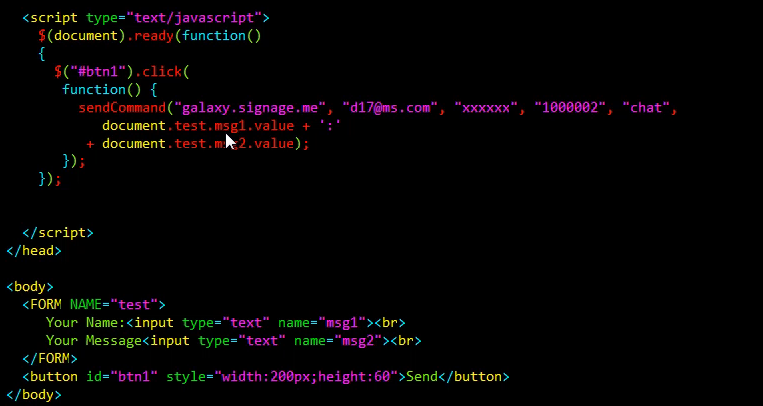
Here is the sample HTML page that we were using to generate and communicate through the Digital Signage system and what you can see here is that we have basically including two files, one is a Jquery file and another one is the sendCommand JavaScript library. So you want to make sure that you include these two files in your script as well and you can grab the Source Code from http://signage.me/demo/testChat.html
|
|
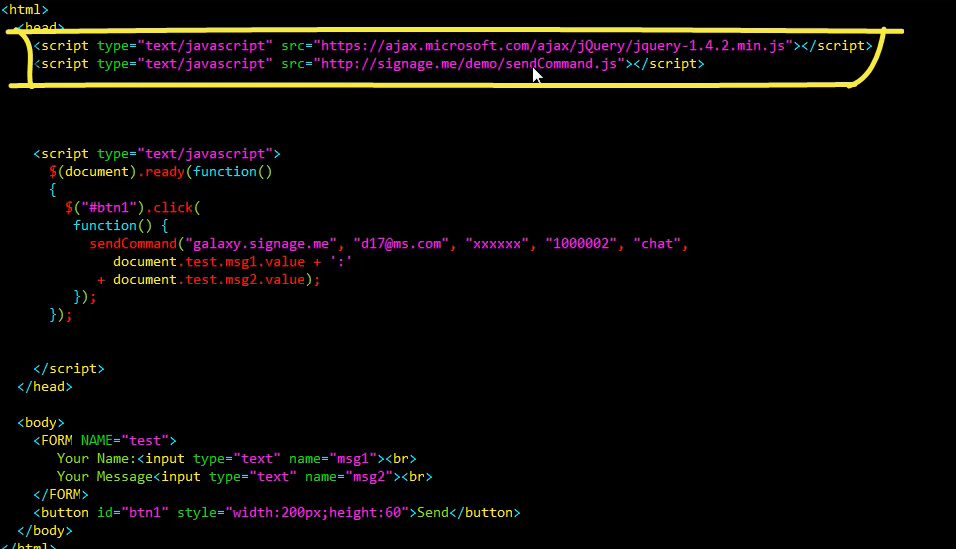
So you can just grab the code from there but you will need to modify three different things. You will need to modify the username to match your username and the password as well as the station ID.
|
|

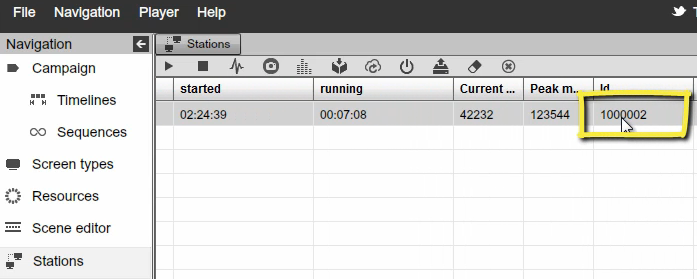
Where do you grab this station ID from? You simply need to switch to Stations in the Signage Studio, select a running station that you want to converse with and if you scroll over to the right you will get your Station ID. So you want to make sure that you use the same Station ID that you want to communicate with.
|
|
Now notice that we have also put right here Chat and this is the Event name.
|
|
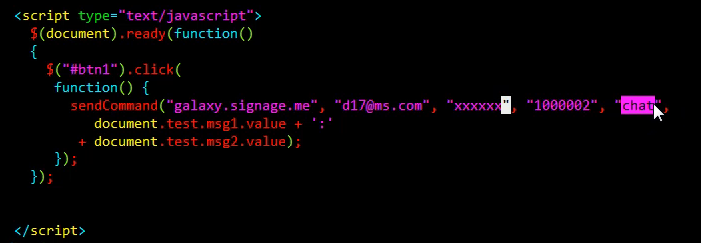
And if we switch back to the Signage Studio and go back to the Chat Component, to Events, you will notice that we used the same Event name.
|
|

So you can use any string you want but just make sure that the two match. And as far as the HMTL its pretty straight forward, we have two input boxes, we have a message1 and a message2 and when a person clicks on Send JavaScript will simply grab these fields from test.message1 and test.message2, and send them to the specified Station.
|
|
As you can see it’s very simple to setup Chat on the Digital Signage screen and we are certain that you find this compo0nent useful.
Copyrights MediaSignage© Inc